Making your own protein bars is surprisingly simple. At its core, you're just mixing a protein source, a binder, and a sweetener, then pressing it all into a pan to chill. But the real magic happens when you start choosing wholesome, plant-based ingredients to create a snack that’s worlds better—and tastier—than anything you can buy in a store.
Skip the Store and Make Protein Bars at Home

Ever flipped over a store-bought protein bar and tried to read the ingredient list? It can feel like a science experiment, packed with weird preservatives, way too much sugar, and a bunch of artificial flavors. Learning how to make homemade protein bars is a total game-changer, both for your family’s health and your wallet.
This isn’t just about saving a few bucks. It’s about taking back control over what you and your loved ones are actually eating. You get to call the shots on every single ingredient, which is amazing for anyone managing allergies, aiming for cleaner foods, or just craving something that genuinely tastes good.
A Fun Project for the Whole Family
Think of this less as a chore and more as a fun kitchen project. The process is so straightforward—mostly just mixing and pressing—that it’s the perfect activity to get the kids involved. They absolutely love getting their hands a little sticky and feel so proud eating something they helped create.
Getting them hands-on is a brilliant way to build excitement around healthy food. When they’re the ones adding the chocolate chips or pressing the mixture into the pan, that "healthy bar" suddenly becomes way more exciting than a pre-packaged cookie. It turns snack time from a battle into a celebration of something you made together.
The best part? You're creating positive food memories. Instead of reaching for sugary kids snack bars with little nutritional value, your kids will start asking for the "special bars" they helped make.
This shift in perspective is huge. The global protein bar market has exploded, valued at around $14.98 billion as more people search for convenient, healthy options. By making them at home, you're tapping into this trend on your own terms, guaranteeing you get the best nutrition and freshness. You can find more insights on the protein bar market growth on towardsfnb.com.
Ultimately, making your own protein bars is about crafting wholesome, delicious food for the people you love. It’s about knowing that every single bite is filled with goodness you chose yourself. Let’s get started on creating snacks that are not only good for you but also incredibly satisfying.
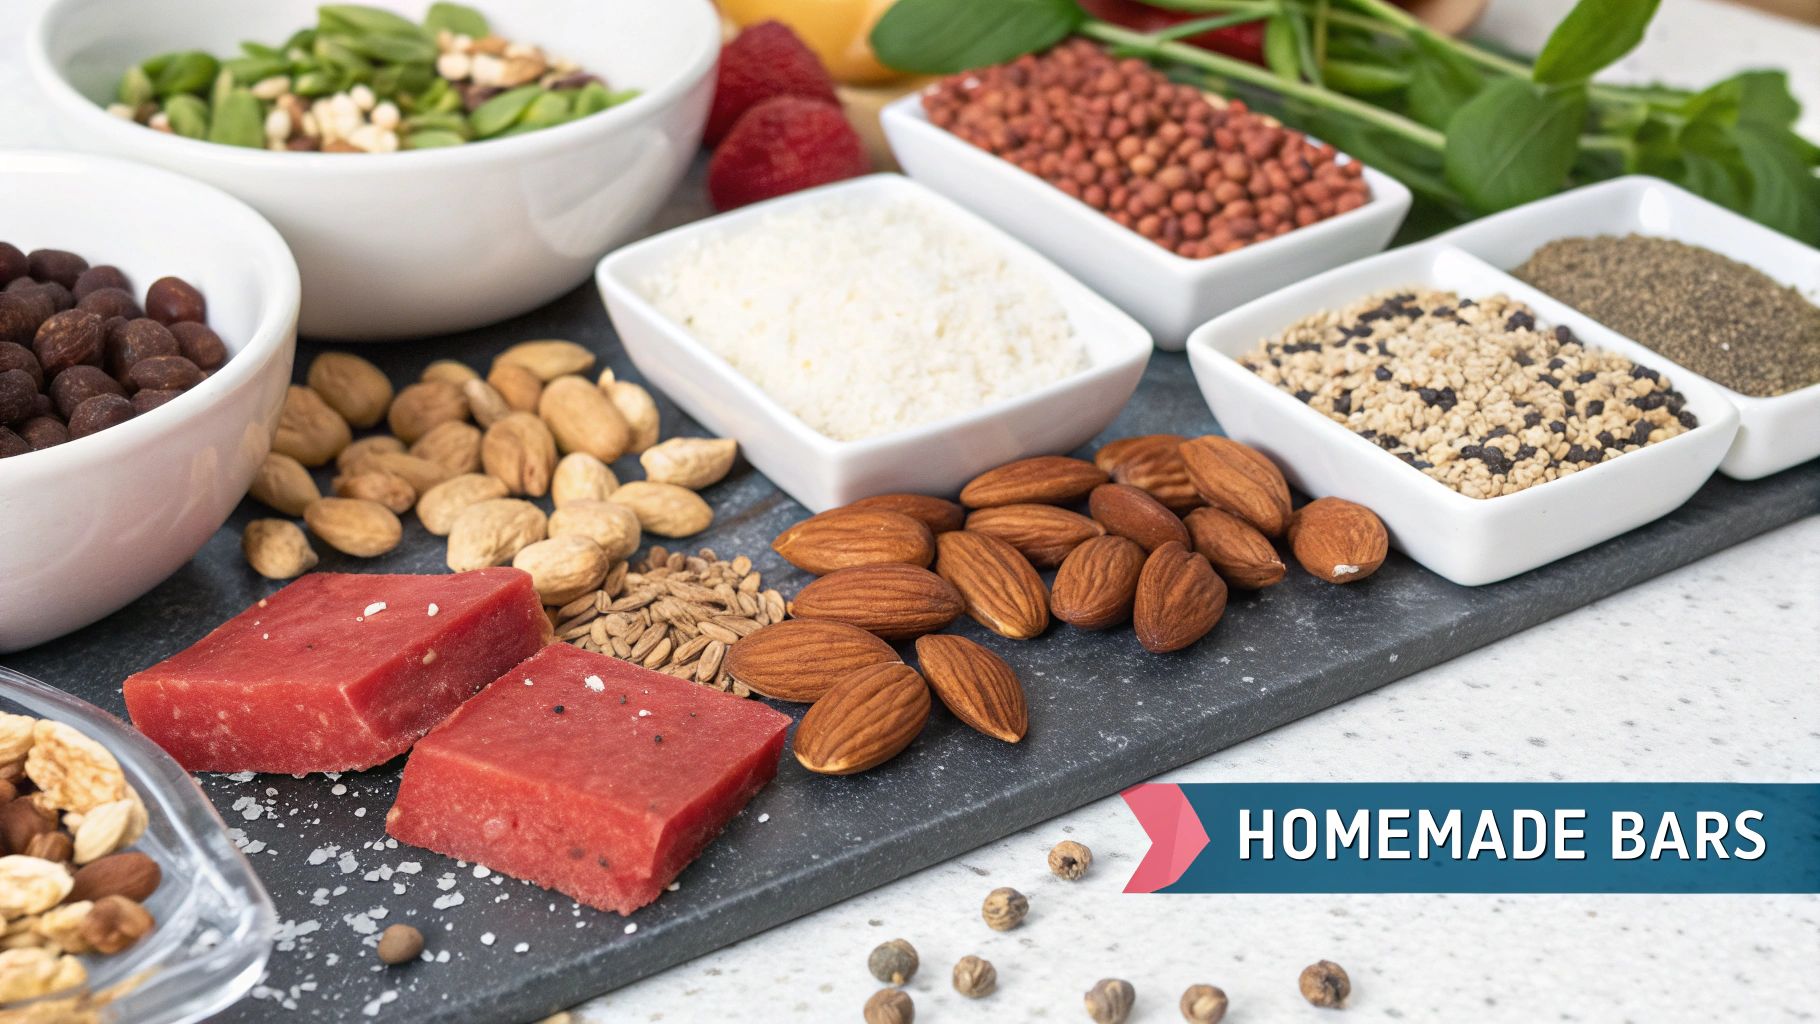
Building Your Protein Bar Pantry
The secret to an amazing homemade protein bar—the kind that makes your kids totally forget about those sugary, neon-colored snacks—is having the right building blocks ready to go. You don't need a complicated shopping list that sends you all over town. We’re going to focus on simple, plant-based powerhouses that are easy to find and even easier to use.
Think of this as creating your core protein bar toolkit. Once you have these staples on hand, you can whip up a batch whenever a snack craving hits, dodging that last-minute scramble for something healthy. It’s all about making wholesome snacking a simple, sustainable habit.
The Foundation: Plant-Based Protein
First things first: the protein powder. This is the muscle-building foundation of your bars. Since we’re focusing on no-bake recipes (which are perfect for getting the kids involved!), you’ll want a powder that mixes up smoothly without getting gritty or chalky.
Two fantastic plant-based options I always come back to are:
- Pea Protein: A super popular choice because it has a really mild flavor and a smooth texture. It’s also hypoallergenic, which makes it a safe bet for families dealing with nut or soy allergies.
- Brown Rice Protein: Another excellent, easy-to-digest option. It can sometimes have a slightly heartier texture than pea protein, so it’s great for bars where you want a bit more of a rustic, chewy feel.
Either of these is a great starting point when you're learning how to make homemade protein bars. I’d suggest grabbing an unflavored or vanilla version to give yourself the most freedom with flavor combinations. For a deeper dive, you can explore a ton of excellent plant-based protein sources in our detailed guide.
The Binders: Your Delicious Glue
Next up, the binders. These are the creamy, delicious ingredients that hold everything together while adding healthy fats to keep you and your little ones full and energized. Without a good binder, you’ve just got a bowl of tasty dust!
My absolute go-tos are nut or seed butters. They bring a wonderful richness, flavor, and that perfect dough-like consistency we’re after.
- Almond Butter: It has a mild, slightly sweet flavor that pairs well with just about anything, from dark chocolate to dried fruit.
- Sunflower Seed Butter: This is the hero for any nut-free household! It has a unique, earthy flavor and a super creamy texture that works beautifully in no-bake recipes.
When you're at the store, flip the jar over and look for natural butters. The only ingredients should be the nut or seed itself and maybe a little salt. Skip the ones loaded with added sugars and hydrogenated oils—they kind of defeat the purpose of making a healthier snack from scratch.
The rise of flexitarian, vegan, and allergy-aware diets means home cooks are increasingly experimenting with ingredients like pea protein, chickpea flour, and nut butters, which are now available in most major markets. This shift is reflected in the market's rapid expansion. The global plant-based bars market, which includes many protein-rich varieties, was valued at $8.63 billion and is projected to reach $16.98 billion by 2032. Discover more about these global dietary trends and their market impact on fortunebusinessinsights.com.
The infographic below breaks down the simple choices you'll make when building your bars from these pantry staples.

This simple flow—protein, binder, and sweetener—is the fundamental blueprint for creating countless delicious and healthy protein bar variations right in your own kitchen.
To make things even easier, here's a quick cheat sheet for your next grocery run.
Your Plant-Based Protein Bar Shopping List
| Ingredient Category | Examples | What It Does |
|---|---|---|
| Protein Powder | Pea Protein, Brown Rice Protein | Forms the base and adds the protein punch. |
| Binder | Almond Butter, Sunflower Seed Butter | Holds everything together and adds healthy fats. |
| Natural Sweetener | Maple Syrup, Date Paste | Adds sweetness and helps bind the mixture. |
| Fiber & Texture | Rolled Oats, Chia or Flax Seeds | Adds chewiness, fiber, and omega-3s. |
With these four categories covered, you'll have everything you need to get started.
Natural Sweeteners And Fiber Boosters
Finally, let’s talk about sweetness and fiber. We want our bars to taste like a treat, not a chore, and we can easily do that without any refined sugar. Natural liquid sweeteners are perfect because they also help bind the ingredients. Maple syrup is a fantastic choice; its rich flavor complements the nutty and earthy tones of the other ingredients beautifully.
For fiber and that satisfying chew, rolled oats are your best friend. They make the bars feel really substantial. Chia seeds or ground flax seeds are also pantry must-haves. They’re amazing at absorbing liquid, helping the bars set, and adding a powerful dose of omega-3s and fiber.
A little pro tip: buying these items in bulk is a smart move. Not only does it make this healthy habit more affordable, but it also means your pantry is always stocked and ready for action. You'll be amazed at how quickly these simple staples can transform into the perfect grab-and-go breakfast, after-school snack, or pre-workout fuel.
The Perfect No-Bake Protein Bar Recipe

Alright, let's get into the fun part—making some kitchen magic. This is our family's go-to, absolutely foolproof, no-bake protein bar recipe. Think of it as your master blueprint. It’s a delicious starting point that's incredibly easy to tweak and make your own.
The best part? No oven needed. This makes it the perfect recipe for getting little helpers involved without any stress.
One of the biggest hang-ups when you're figuring out how to make homemade protein bars is getting the texture just right. I designed this recipe to be super forgiving, so don't worry about getting every measurement exact. Let’s dive in and make some snacks your kids will actually ask for.
Gathering Your Ingredients
Before we start, let's pull everything out of the pantry. I find that having ingredients measured and ready to go makes the whole process smoother, especially when you have little hands eager to "help." This recipe is all about simple, wholesome stuff that comes together for a chewy, satisfying bar.
Here’s what you’ll need to get started:
- Rolled Oats: You'll want 1 ½ cups of the old-fashioned kind. They give the bars that classic chewy bite and a great dose of fiber.
- Plant-Based Protein Powder: Grab ½ cup of your favorite vanilla or unflavored plant-based protein.
- Nut or Seed Butter: You'll need ⅔ cup of something creamy and natural, like almond or sunflower seed butter. This is what holds everything together.
- Maple Syrup: Measure out ⅓ cup of pure maple syrup for natural sweetness and extra binding power.
- Mix-Ins: Let's start with ¼ cup of chia seeds or ground flax seeds for an omega-3 boost, plus ½ cup of something fun like mini dark chocolate chips or dried cranberries.
These core ingredients create a perfectly balanced bar. From here, the world is your oyster—customization is where the real fun begins.
Mixing Your Protein Bar Dough
Now for the best part: turning all those ingredients into a delicious, dough-like mixture. This is the perfect job for any kids who want to take over stirring duties. It’s a simple two-stage process: combine the dry stuff, then mix in the wet stuff.
First, grab a large mixing bowl. Toss in all your dry ingredients—the rolled oats, protein powder, chia or flax seeds, and any other add-ins like chocolate chips. Give it a good stir with a spatula to get everything acquainted.
Next, it's time for the "glue." Add your nut butter and maple syrup right into the bowl. Now, get to mixing! It might seem a bit dry or crumbly at first, but keep at it. The friction (and the warmth from your hands, if you decide to go for it!) will help the nut butter soften up and bring everything together.
My Personal Tip: If the mix feels too dry and just won't come together, add a tiny splash of water or plant-based milk—literally a teaspoon at a time. On the flip side, if it feels too sticky, just sprinkle in another tablespoon of oats or protein powder until you have a firm, workable dough.
You're aiming for a consistency that feels like thick cookie dough. It should stick together easily when you pinch it, but it shouldn't feel greasy or overly wet.
Pressing and Chilling for Perfect Bars
Once your dough is just right, it's time to press it into a pan. This is the key to getting those clean, sharp-looking bars. Line an 8x8 inch square baking pan with parchment paper, but let a little hang over on two sides. These "handles" make it a breeze to lift the whole block out later for slicing.
Dump all of the mixture into your lined pan. Here’s a little trick to avoid a sticky mess: lay another piece of parchment paper on top of the dough. Now use your hands or the bottom of a flat glass to press down firmly and evenly. The goal is to get it as compact as possible—this is what keeps your bars from crumbling.
Once it's flat and packed in, just peel off that top layer of parchment. Now for the easiest step: patience! Cover the pan and pop it in the refrigerator for at least one hour to chill and set. This is what solidifies the bars and makes them super easy to slice.
You've just learned the fundamental process. Think of this as the start of your homemade snack adventure—from here, you can start playing with all sorts of amazing flavors.
Create Your Own Signature Flavors

Alright, you've mastered the base recipe. Now for the fun part—putting on your snack artist hat! This is where you get to transform that simple, delicious foundation into something that perfectly nails every craving for everyone in your house.
Honestly, the real joy of learning how to make homemade protein bars is the endless creativity.
Forget those boring, one-note kids snack bars from the store. You’re in control now. You can craft flavors that rival your favorite desserts, all while keeping things incredibly wholesome. It's especially great if you have picky eaters—when they get to choose the "fun stuff" to add, they're way more excited to eat the finished product.
Our Family's Favorite Flavor Twists
Over the years, my kitchen has turned into a little flavor lab. We've landed on a few combinations that are on constant rotation—the tried-and-true favorites that disappear from the fridge almost as fast as I can make them.
Here are five of our most-loved variations to get you started:
- Chocolate Peanut Butter Cup: A total no-brainer. Just add two tablespoons of unsweetened cocoa powder to your dry ingredients and use peanut butter as the binder. Pro tip: press a few extra dark chocolate chips on top before chilling.
- Blueberry Muffin: This one tastes just like a cozy breakfast treat. I use cashew butter for a mild, creamy base and gently fold in about a half-cup of dried blueberries. A dash of cinnamon and a teaspoon of lemon zest really make it pop.
- Chocolate Chip Cookie Dough: The ultimate kid-approved version. Stick with almond butter and vanilla protein powder, and don't be shy with the mini dark chocolate chips. The secret? A tiny pinch of sea salt to get that classic cookie dough taste just right. It's like a healthy cookie!
- Tropical Coconut Mango: For a little taste of sunshine, use almond butter and add ½ cup of unsweetened shredded coconut and ½ cup of chopped dried mango. It's chewy, sweet, and wonderfully bright.
- Apple Cinnamon Spice: Perfect for those fall vibes. Add one teaspoon of cinnamon and ¼ teaspoon of nutmeg to your dry mix, then fold in ½ cup of finely chopped dried apples. It seriously tastes like apple pie.
Flavor Twist Inspiration
Explore these easy and delicious variations to customize your master protein bar recipe.
| Flavor Profile | Key Add-Ins | Pro Tip |
|---|---|---|
| Mocha Chip | 1 tsp instant espresso powder, mini chocolate chips | Use a coffee-flavored protein powder for an extra jolt. |
| Lemon Poppy Seed | 1 tbsp lemon zest, 1 tbsp poppy seeds | A drizzle of melted white chocolate on top is divine. |
| Cranberry Orange | ½ cup dried cranberries, 1 tbsp orange zest | Almond butter works best to let the citrus shine. |
| Pistachio & Rose | ½ cup chopped pistachios, ½ tsp rosewater | A little goes a long way with rosewater—start small! |
These are just a jumping-off point, of course. Your pantry is full of possibilities!
Easy Swaps For Every Dietary Need
One of the biggest wins of making snacks at home is catering to specific dietary needs without a second thought. Whether you're dealing with allergies or just have ingredient preferences, simple swaps make these bars work for everyone.
Going Nut-Free:
This is a big one, especially for school snacks. The fix is easy: just swap the almond or peanut butter for sunflower seed butter or tahini. Both work beautifully as binders and add their own delicious, earthy flavor.
Ensuring It's Gluten-Free:
While oats are naturally gluten-free, they’re often processed in facilities that also handle wheat. If you're making these for someone with celiac disease or a serious intolerance, be sure to grab a bag of certified gluten-free rolled oats to be completely safe.
If you’re on the hunt for even more snack inspiration, we have a great list of other clean eating snack ideas your whole family will love.
Don't be afraid to experiment! Your next great flavor combination is just a mix-in away. And if you want to expand your homemade treat repertoire, you might enjoy these creative Matcha pancake recipes for another fun kitchen project. The goal is to make healthy eating feel like an exciting adventure, not a chore.
Tips for Slicing, Storing, and Troubleshooting
High five! You’ve mixed, pressed, and chilled a beautiful slab of protein bar goodness. Now comes the part that makes sure all that effort pays off: keeping your bars fresh, tasty, and ready for those grab-and-go moments.
The secret to making your homemade snacks last is all in the storage, and I’ve got a few simple tricks to solve any little kitchen hiccup you might run into.
Getting the Perfect Slice
First up: getting those perfect, clean slices without the whole thing turning into a crumbly mess. Patience is your best friend here.
Make sure your bars are thoroughly chilled—at least an hour in the fridge is good, but a little longer is even better. Grab a large, sharp knife and press straight down firmly. Whatever you do, don't saw back and forth, as that’s a one-way ticket to a pile of crumbs.
For extra-clean cuts, I like to run the knife under hot water and wipe it dry between each slice. It works like a charm.
Fridge vs. Freezer: Where Should Your Bars Live?
Once they're sliced, where do you put them? This is a question I get all the time from people learning how to make homemade protein bars. The answer really depends on how fast your family is going to devour them.
-
For the Fridge: If you know the bars will be gone within a week, the fridge is perfect. Just pop them in an airtight container. I always place a small piece of parchment paper between the layers to keep them from sticking together. This keeps them firm but still perfectly chewy.
-
For the Freezer: If you're stocking up for the long haul (up to three months), the freezer is your go-to. Wrap each bar individually in parchment paper or plastic wrap, then toss them all into a freezer-safe bag. This is a lifesaver for busy weeks—just pull one out a few minutes before you want to eat it.
Because these bars are made with real food and no commercial preservatives, proper storage is key to keeping them fresh. If you're curious about how food stays fresh naturally, you can learn more about what natural preservatives are in our handy guide.
Solving Common Protein Bar Problems
Sometimes things don’t go exactly as planned in the kitchen, and that's completely okay! Most issues with homemade bars are an easy fix. Here’s how to troubleshoot the most common problems I’ve run into myself.
Problem: "My Bars Are a Crumbly Mess!"
This usually just means your mixture was a bit too dry. The fix is simple: you need more binder! Next time, try adding an extra tablespoon or two of your nut butter or maple syrup. A tiny splash of water or plant-based milk can also help bring a dry dough together in a pinch.
Problem: "Help, My Bars Are a Sticky Goo!"
The opposite issue! If your bars are a sticky, gooey mess, you likely have too much liquid or not enough dry ingredients to absorb it. The solution is just to add a little more of your dry components. Sprinkle in another tablespoon of protein powder, rolled oats, or ground flax seeds until the dough is firm and easy to handle.
A great homemade protein bar strikes the perfect balance—it should be firm enough to hold its shape but chewy enough to be a joy to eat. Don't be discouraged if your first batch isn't perfect; each try gets you closer to your family's ideal snack.
Once you've got your bars looking and tasting perfect, you might want to show them off! Exploring some basic food photography tips can help you capture just how delicious your homemade treats really are.
Mastering these simple adjustments will empower you to perfect your technique, ensuring every batch is a home run that keeps your kids reaching for a healthy snack instead of a processed cookie.
Your Top Questions, Answered
When you start making your own snacks, a few questions are bound to pop up. It's totally normal! Here are the most common things I get asked, especially by other parents trying to make healthier choices for their kids.
Can I Make These Protein Bars Without Protein Powder?
Of course! While protein powder is the fastest way to pack in the protein, you can absolutely make a killer energy bar without it. The trick is to swap in other ingredients that are naturally high in protein.
Think of it less as a "protein bar" and more as a super wholesome "snack bar." You'll just want to bump up the amounts of the other powerhouse ingredients.
A few of my go-to swaps include:
- Adding more hemp seeds or almond flour.
- Using powdered peanut butter, which is packed with protein but has less fat.
- Tossing in extra chopped nuts or seeds for more crunch and a natural protein lift.
The final bar will feel a little more like a dense, chewy granola bar, but it will still be a fantastic homemade snack that blows those sugary store-bought kids snack bars and cookies out of the water.
How Do I Make These Bars Lower in Sugar?
This is a big one, and you’ve got plenty of options to cut the sugar without losing the yum-factor. A few simple tweaks can make all the difference.
Start by being a label detective. Always grab unsweetened nut butters and unsweetened protein powders. You can also dial back the maple syrup a little bit. If you do, you might need a spoonful of unsweetened applesauce or mashed banana to help everything stick together, but just remember that adds moisture, so they'll need to stay in the fridge.
For that chocolatey flavor kids crave, look for sugar-free chocolate chips sweetened with stevia or monk fruit. Another great move is to use a really dark chocolate (85% or higher). It has a rich, intense flavor with way less sugar than milk chocolate.
The point isn't to get rid of all sweetness, but to be in control of it. When you use real, whole-food ingredients, you get to decide what's "sweet enough" for your family, without inviting a sugar crash.
Are Homemade Protein Bars Actually Cheaper?
Yep, in the long run, they are way more budget-friendly. I know there's an upfront cost for pantry staples like a big tub of protein powder or a giant jar of almond butter, but the cost per bar is so much lower than buying them pre-made.
Just think—a single high-quality protein bar at the store can set you back $2 to $4. When you make your own, you can easily get that cost down to under $1 per bar, especially if you buy your main ingredients in bulk. It’s a total game-changer for making healthy, grab-and-go snacks affordable for the whole family.
What’s the Best Way to Get My Kids Involved?
This recipe is practically made for little helpers! Getting kids into the kitchen is one of the best tricks for getting them excited about what they're eating. Let them take charge of the simple, safe tasks where they can feel like they're really contributing.
Here are a few jobs they'll love:
- Measuring & Pouring: Let them scoop the dry ingredients and dump them into the bowl. It's a great, low-mess way for them to get in on the action.
- Stirring: Hand over the spoon and let them mix the dry ingredients together.
- Pressing: This is almost always the favorite part. Let them get their hands in there and press the dough firmly into the pan.
- Decorating: Let them go wild sprinkling on toppings like mini chocolate chips, shredded coconut, or colorful dried fruit.
Even giving them small choices—like, "Should we add dried cranberries or chocolate chips today?"—makes them feel like part of the team. They’ll be so proud to dig into the delicious snack they helped create.
At Skout Organic, we believe that snacking should be a joyful adventure for the whole family. If you're looking for more delicious, convenient, and always organic options, explore our range of kids' snack bars, soft-baked cookies, and protein bars. Build your custom snack box today!
Kids Snack Bars
Soft-Baked Cookies
Protein Bars
Build A Box
Shop All