 Kids Snack Bars
 Soft-Baked Cookies
 Protein Bars
 Build A Box
 Shop All


Yes, you can absolutely master oven dehydrating fruit using the regular old oven in your kitchen—no fancy gadgets required! It's a super simple, low-heat trick that slowly coaxes the moisture out, concentrating the fruit's natural sweetness into a chewy, delicious snack that'll make you feel like a kitchen superhero.
This method is perfect for turning everyday fruits into long-lasting, healthy treats your whole family will actually get excited about. No more finding half-eaten snack bars in the car seats!
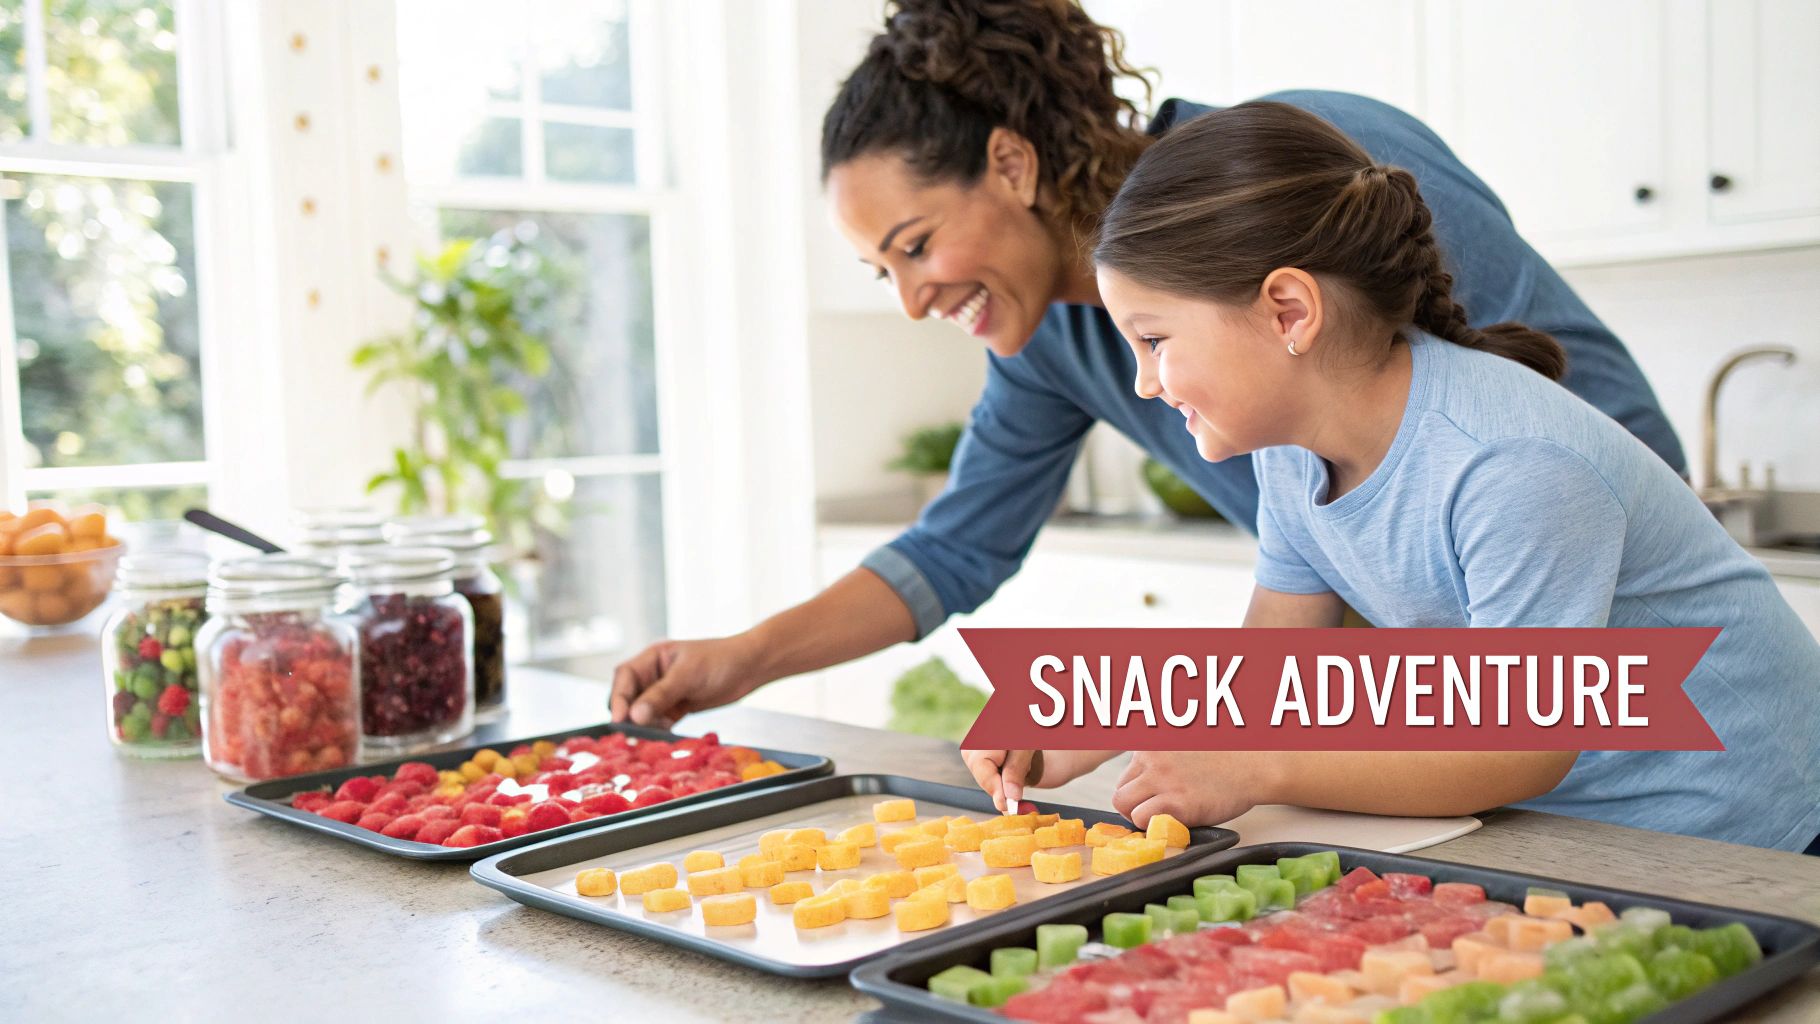
Your Adventure in Homemade Fruit Snacks Starts Here
Imagine turning your kitchen into a fun, mini snack factory. Picture vibrant trays of apples, strawberries, and mangoes slowly transforming into chewy, candy-like treats that your kids will actually ask for. Seriously!
This isn't about complicated recipes or expensive equipment. It’s about the simple magic of using your oven to dehydrate fruit. This process is more than just a way to preserve food—it's an easy and incredibly rewarding way to know exactly what's going into those little tummies.
Why Choose Your Oven
While dedicated dehydrators are great, using your oven is a popular and super accessible alternative. The appeal is simple: a standard household oven can maintain the low, sustained temperatures needed for drying fruit—typically between 50–70°C (120–160°F)—for several hours.
This lets you create the same shelf‑stable, lightweight snacks you see in stores without buying another appliance that will just clutter up your counter.
This guide will walk you through everything, transforming your approach to snack time. If you're tired of scrutinizing the labels on kids' snack bars and cookies, you’ll love the satisfaction of creating your own.
More Than Just a Snack
Oven dehydrating is a fantastic way to tackle a few common household goals all at once. It’s an opportunity to:
- Reduce food waste: Got a few apples looking a little sad or bananas that are one day away from becoming banana bread? Dehydrating gives them a delicious new life instead of letting them go to waste.
- Control ingredients: Say goodbye to the weird sugars, preservatives, and mystery dyes often found in store-bought fruit snacks. You’re the boss of this snack operation!
- Make healthy eating fun: Getting kids involved in slicing and arranging fruit makes them way more excited to eat the final product. It’s a wonderful family activity that might even get them to try something new.
The real beauty of oven dehydrating is turning simple, pure fruit into something that feels like a special treat. You're not just making food; you're creating concentrated bites of sunshine that pack a flavorful punch.
Ready to fill your pantry with delicious, portable snacks perfect for lunchboxes, road trips, and after-school fuel? You can find more inspiration in our guide to clean eating snack ideas. Let's get started on your journey to becoming a homemade snack pro.
Choosing and Preparing Fruit for Perfect Results
The secret to amazing dehydrated fruit—the kind that rivals those pricey organic snack bars your kids beg for—starts long before you even preheat the oven. It all comes down to picking the right produce and giving it a little TLC. This is the foundation that makes your snacks look and taste incredible.
Think of it this way: what you put in is what you get out. Choosing fruits at their peak ripeness is everything because the drying process concentrates all those flavors. A perfectly ripe mango becomes a sweet, chewy slice of tropical sunshine, while a bland one just becomes… well, a bland, chewy slice.
The Best Fruits for Your First Batch
While you can dehydrate almost any fruit, some are total superstars in the oven. They’re forgiving for beginners and give you delicious results every single time. Why not start with these crowd-pleasers?
- Apples: A classic for a reason. They turn sweet and slightly tangy, and their chip-like texture is perfect for little hands. A much healthier "crunch" than a cookie!
- Bananas: These transform into sweet, crunchy "chips" that are a fantastic replacement for sugary cookies. They taste like candy!
- Strawberries: Their flavor intensifies into something almost candy-like. The tartness is just delightful, and they look like little red jewels.
- Mangoes: The ultimate chewy treat. The texture is incredible, almost like a natural fruit leather. Kids go wild for these.
This is a great time to get the kids involved! Let them help wash the berries or pick out the best-looking apples at the store. When they have a hand in making the snacks, they're so much more excited to eat them.
Remember, the goal here is a snack that's naturally sweet and appealing on its own. Starting with flavorful, ripe fruit means you won't need to add any sugar, keeping your homemade treats pure and simple.
Slicing for Success and Preventing Browning
Once you've chosen your fruit, it's time to prep. This is where consistency becomes your best friend. For even drying, every single slice needs to be roughly the same thickness. If your pieces are all different sizes, you'll end up with some that are brittle and over-dried while others are still soggy.
A simple mandoline slicer is a game-changer for this, helping you get uniform ¼-inch (about 6mm) slices in minutes. If you're just using a knife, no problem—just take your time and aim for consistency over speed.
Now, for fruits like apples, pears, and bananas that tend to brown the second you look at them, a quick pre-treatment makes all the difference. This little step keeps them looking vibrant and appetizing, which is a must for picky eaters.
Just give the slices a quick five-minute soak in a bowl of cold water with a splash of lemon juice. The citric acid stops the oxidation (the process that causes browning) in its tracks.
This tiny bit of effort ensures your snacks look just as good as they taste, making them completely irresistible.
Here’s a quick-reference guide to get you started with some of the most popular fruits for oven-drying.
Best Fruits for Oven Dehydrating and Their Prep
| Fruit Type | Ideal Slice Thickness | Pre-treatment (Optional) | Why It Works Well |
|---|---|---|---|
| Apples | 1/4 inch (6mm) | Lemon water soak | Holds its shape well and develops a sweet, chewy texture. |
| Bananas | 1/4 inch (6mm) | Lemon water soak | Becomes wonderfully sweet and chip-like when fully dried. |
| Strawberries | 1/4 inch (6mm) | None needed | Their high water content requires patience, but the flavor payoff is huge. |
| Mangoes | 1/4 inch (6mm) | None needed | Creates a leathery, candy-like snack with intense tropical flavor. |
These four are practically foolproof and are a great way to build your confidence. Now that your fruit is perfectly prepped, you're ready to arrange it for its slow, flavor-concentrating bake.
Mastering Your Oven for Low and Slow Dehydration
This is where the real magic happens. Forget intense heat; the secret to incredible dried fruit is a gentle, patient approach. We’re talking low and slow—a process that coaxes the moisture out while concentrating all that natural, fruity sweetness into something truly special.
Think of it as the opposite of baking a cake. Instead of high heat to cook, you’re using minimal warmth to simply dry. This patient process caramelizes the fruit's natural sugars, creating a flavor intensity that store-bought candy just can’t compete with. It's how you turn a simple strawberry into a chewy, flavor-packed gem that your kids will actually ask for.
Finding Your Oven's Sweet Spot
Your oven's lowest temperature setting is your new best friend. For most, this falls somewhere between 140-170°F (about 60-75°C). If your oven doesn't go that low, don't sweat it—just set it to its lowest possible temperature. The goal is to create a warm, dry environment, not a hot one.
Here’s a little trick that makes a huge difference: prop the oven door open just a crack with a wooden spoon or a heat-safe silicone spatula. It might sound strange, but it’s crucial. This allows all that moisture from the fruit to escape and gets the air moving, preventing the fruit from steaming or, even worse, baking.
Your oven isn't just baking; it's becoming a flavor concentrator. The low heat and gentle airflow work together to slowly remove water, leaving behind pure fruit essence. This is how you create snacks that rival those pricey organic kids' snack bars.
If your oven has a convection setting, now is the time to use it! That fan is a game-changer, circulating the warm air evenly around every single fruit slice. Consistent airflow is key, so if you're having trouble with your oven, you might need to look into troubleshooting an oven fan that is not working to get the best results.
Trusting Your Senses to Check for Doneness
While time estimates are helpful, every oven is different, and so is every fruit. Juicy mango slices will naturally take longer than thin apple chips. Your best tools for checking doneness aren't a timer—they're your eyes and your fingertips.
This simple infographic breaks down the prep steps that get you to this stage.
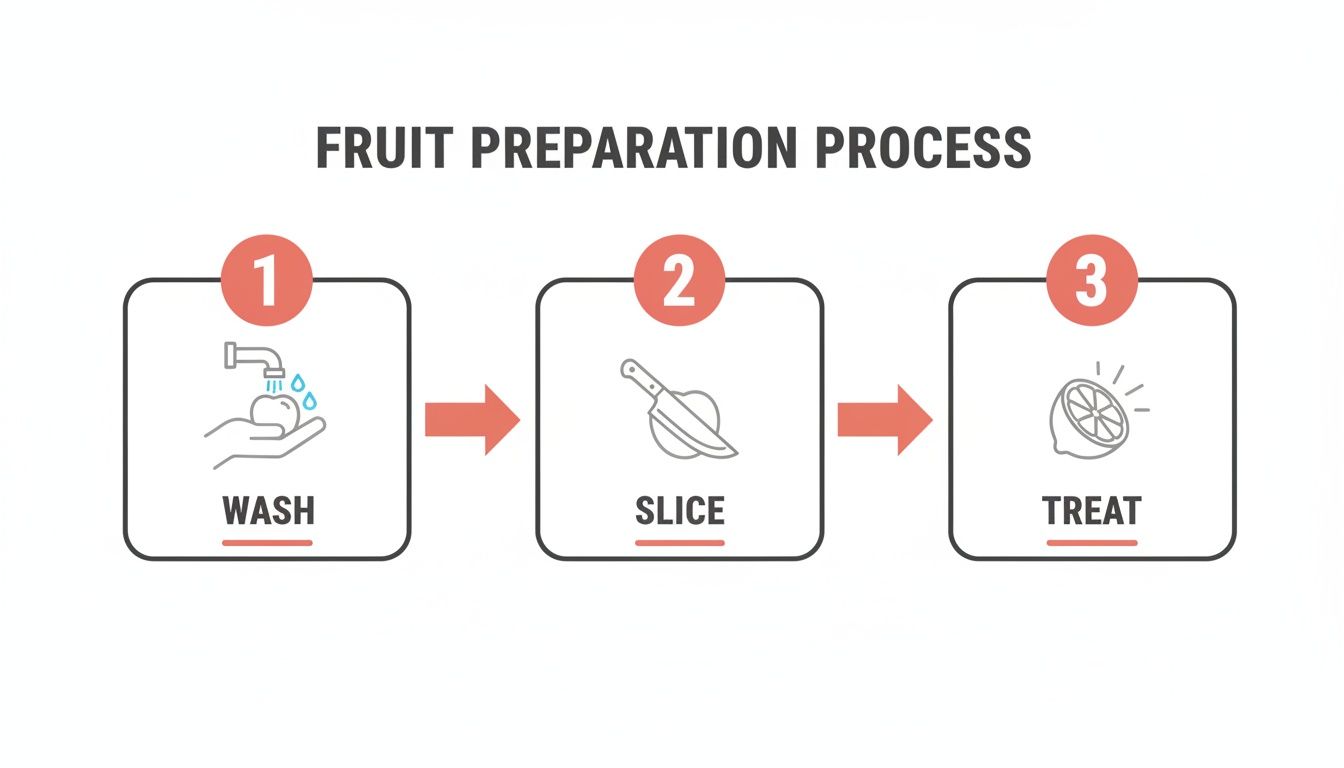
As the visual guide shows, proper washing, slicing, and treating create the ideal foundation for perfect results in the oven.
So, what are you looking for? The ideal texture is leathery and pliable.
- Apples and Bananas: These should feel dry to the touch. You can pull them when they’re leathery or leave them a bit longer if you want them slightly crispy.
- Berries and Mangoes: Think of a natural fruit roll-up—chewy and flexible. They shouldn't feel sticky or have any visible wet spots.
Make sure to pull a piece out and let it cool for a minute before you test it. Fruit always feels a bit softer when it’s warm. If it’s still too moist, just pop the tray back in and check again in another 30-60 minutes. Patience really is your final, most important ingredient.
Properly Cooling and Storing Your Homemade Treats
You did it! You’ve successfully turned fresh fruit into gorgeous, oven-dried snacks. But hang on—before you stash away those beautiful, jewel-toned treats, there’s one final step that separates good results from truly great ones.
The process isn't quite over, and what you do now ensures every piece stays perfectly preserved and delicious for weeks or even months. It’s all about a little patience. After coaxing the moisture out for hours, you need to let the fruit cool completely and then "condition" it. Trust me, this simple, often-overlooked phase is your best defense against mold and the secret to that perfect, chewy texture.
The All-Important Conditioning Phase
Think of conditioning as letting your fruit settle in and get comfortable. Once the slices have cooled completely to room temperature, loosely pack them into airtight glass jars. You only want to fill them about two-thirds of the way. Seal the jars up and let them hang out on your counter for about a week.
Once a day, give the jars a good shake. This little ritual does more than just look cool; it redistributes the fruit and, more importantly, any tiny bits of leftover moisture. Keep an eye out for any condensation forming inside the jar. If you see it, that’s your sign the fruit needs a bit more time in the oven. Just spread it back on the trays, pop it back in for another hour or so, then let it cool and start the conditioning process over.
This step is non-negotiable for long-term storage. It equalizes the moisture content across all the pieces, so slightly moister bits don’t end up spoiling the whole batch. It's the secret to getting professional-quality results right in your own kitchen.
Smart Storage for Long-Lasting Flavor
Okay, your fruit is officially conditioned and perfectly dry. Now it's time to store it for the long haul. Your mission is to protect your hard work from three enemies: air, light, and moisture. Get this part right, and you'll lock in that amazing flavor and texture.
Your best bets for storage are:
- Airtight Glass Jars: Mason jars are a dehydrator’s best friend. They create a fantastic seal, are reusable, and you get to admire your colorful creations. Just be sure to store them in a cool, dark spot like a pantry or cupboard.
- Vacuum-Sealed Bags: If you're aiming for the absolute longest shelf life, vacuum sealing is the way to go. It removes nearly all the air, which dramatically slows down any breakdown in quality.
Properly dried and stored fruit is a perfect example of preserving food with one of the oldest tricks in the book. Dehydrating removes roughly 80–95% of the water from fruit, which is what concentrates its natural sugars and nutrients. For a deeper dive into the science, you can explore the principles behind what are natural preservatives. It’s a fantastic way to turn a shelf life of days into months.
To keep your homemade snacks both delicious and safe, it’s always smart to have a good handle on food safety temperature control guidelines. With these final steps, you’ll always have a healthy, homemade snack ready for any occasion—perfect for tossing into trail mix, topping yogurt, or just grabbing on the go.
Creative Ways to Enjoy Your Dehydrated Fruit
Alright, here comes the best part. You’ve patiently prepped, dried, and conditioned all that beautiful fruit. Now, it’s time to have some fun and unleash all that concentrated deliciousness on your family's snack routine.
Think of your oven-dehydrated fruit as a powerhouse ingredient, ready to add a chewy burst of natural sweetness to just about anything. This is your chance to skip those store-bought snack bars with their long ingredient lists and create something truly special that your kids will actually love.

Beyond the Jar: Kid-Friendly Ideas
Let's move past just grabbing a handful from the jar (though that’s great, too!). Your dehydrated fruit is incredibly versatile, and it's perfect for making wholesome treats that still feel like a special indulgence.
Here are a few ideas to get you started:
- Breakfast Boost: Finely chop some dried strawberries or peaches and stir them into oatmeal or yogurt. They’ll plump up just enough to release their intense flavor—no added sugar needed.
- Homemade Granola: Toss chopped dried apples and mangoes into your favorite granola recipe during the last few minutes of baking. It adds a delightful chewiness that’s the perfect contrast to the crunch.
- DIY Trail Mix Bar: This is where the kids can really get involved. Set out bowls of your dried fruit, some nuts, seeds, and maybe a few dark chocolate chips. Let everyone build their own custom mix for lunchboxes or after-school fuel.
For even more inspiration, you can explore some fantastic kids' trail mix recipes that are easy to customize with your homemade goodies.
Crafting Your Own Snack Bars and Cookies
This is where you can truly replicate the goodness of high-quality organic snacks right in your own kitchen. Imagine pulling out soft-baked fruit and oat cookies or simple, no-bake snack bars that you made yourself. You’re in complete control of the sweetness and every single ingredient.
By making your own bars and cookies, you’re not just saving money; you're creating a snack that’s bursting with pure, unadulterated fruit flavor. It’s the kind of simple, clean eating that brands like Skout Organic champion.
Try pulsing your dried apples with oats, a dash of cinnamon, and a little nut butter to press into a pan for simple apple-cinnamon energy bites. Or, you can rehydrate dried strawberries and bananas, blend them into a puree, and spread it on a baking sheet to make incredible homemade fruit leathers. The oven-drying skills you’ve already mastered are perfect for this!
The possibilities are genuinely endless. You can craft snacks that are perfectly suited to your family’s tastes, turning your kitchen into the ultimate source for healthy, delicious, and kid-approved treats.
Common Questions About Oven Dehydrating Fruit
Even after you've pulled off a few great batches, some questions are bound to pop up. Think of this as your go-to guide for those "what if" moments that can happen mid-bake.
From sticky fruit to getting the texture just right, here are some quick and practical answers to help you feel confident every time you turn on the oven.
Why Is My Fruit Still Sticky?
This is the most common hiccup, and the answer is almost always the same: lingering moisture. If your fruit feels tacky to the touch even after it has cooled down, it simply needs a little more time in the oven.
The goal is a leathery, pliable texture—not a sticky one.
Give it another 30-60 minutes at your lowest oven setting. This extra time is especially crucial for high-sugar fruits like juicy mangoes and pineapple, which tend to hold onto moisture. Also, double-check that your slices aren't too thick, as that can easily trap moisture in the center.
Think of your oven as a gentle breeze, not a roaring fire. If the fruit feels sticky, the "breeze" just needs a little more time to do its work. Patience is the key ingredient that separates good dried fruit from great dried fruit.
Making Your Own Fruit Leathers
Can you make fruit leathers? Absolutely! This is a fantastic way to use up bruised or overly ripe fruit, turning it into a snack that rivals those pricey organic fruit roll-ups from the store. The process is a lot like what you've already learned.
Here’s how to do it:
- Blend Your Fruit: Puree your chosen fruit until it's perfectly smooth. Fresh or frozen berries work beautifully here. For a thicker, chewier leather, try blending in a banana or a scoop of applesauce.
- Spread It Out: Line a baking sheet with parchment paper. Pour the puree onto the sheet and spread it into a thin, even layer, about ⅛ to ¼ inch thick.
- Dry Low and Slow: Dehydrate at your oven's lowest setting (around 170°F or 75°C) for 3-6 hours. You'll know it's done when the center is no longer sticky to the touch.
This is such an amazing activity to do with kids. They love watching a smoothie transform into a sweet, chewy snack they can roll up and pack in their lunchboxes. It's the perfect, wholesome alternative to sugary cookies and bars.
At Skout Organic, we believe snacking should be a joyful adventure filled with simple, wholesome ingredients. Discover our range of delicious kids' snack bars and treats at https://www.skoutorganic.com.